Search

Thursday 31 December 2020

Learning General d'Armee - AWI variant


Battle of Devil's Crossroads

The vast majority of my games are large skirmish affairs like SP, Mortal Gods, Test of Honour, CoC and even MWWBK. But every now and then I like a bigger scale of battle. A while back, a shedload of 10mm AWI from Pendraken appeared in my lead pile. And very nice they are too! I was looking around for a game to match these to and stumbled across an AWI variant of the recent General d'Armee rules - follow this link for lots of goodness 

This was a test-run to see if it might be the sort of game I could run either at a club evening or longer weekend stint.  I was intrigued by the command phase in particular. The "tube of you" features some Napoleonic demos by the author Dave Brown which I recommend to get you started (and very enjoyable they are too.)

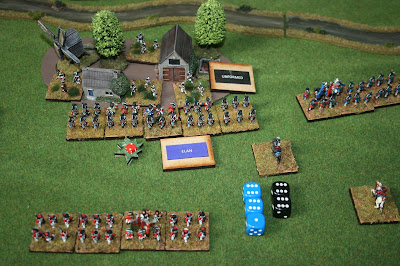
This is a fictional set-up based pretty loosely on GdA's Quatre Bras scenario. I changed the OOB quite significantly to suit the theatre and what I had painted and based. As this was a covid-solo effort, it's mainly from the view of the British commanders as the Americans were stationary given their objectives. The photo below show what was happening by the end of turn 2. 

The winner needed to be in control of at least 2 of the following objectives: the "crossroads" (ummmm it looks like a T-junction to me, boss), the wood on the hill (right hand side) and the farm (bottom centre.) The defended BUA/farm complex towards the centre was far ahead of American lines and manned by some crack Light Infantry. The British enjoy superior troop quality on the whole and deployed their entire force at the start. The Americans suffer from a delayed arrival of some pretty handy reserves. The reserves were due to arrive after a certain number of turns and valuable ADCs had to be used to deploy them (ADCs are explained a bit more below.)


View from the British lines over the bridge towards the 2nd American brigade (mainly Militia)


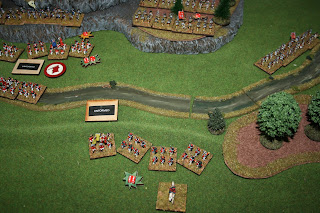
The British advance.
Except the left hand (far side) brigade forgot their orders and failed to move.
The elite centre brigade, featuring Grenadiers, advance towards the farm.

A turn begins with a command phase, where each commander rolls to see how many ADCs are available. One of these can be applied to a brigade for a re-roll if they fail to activate. Two or more are needed for fancier brigade orders such as a direct assault - so ADCs are a precious commodity and force some interesting and realistic command decisions. In the photo above, the British commander did not have a full compliment of ADCs, so spent them on an assault order and a re-roll for the centre brigade. The far brigade promptly failed to activate (they went "hesitant" - they could not move, but if a target presented itself they could fire.) Typical! The British advance was slowed and disjointed, which matches the background reading for the AWI.

British Grenadiers (large battalion, 5 bases strong) advance towards the farm.
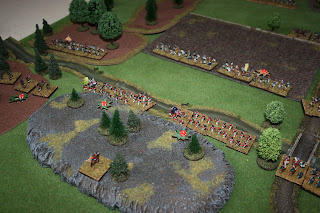
In the background, the Patriots move through the wood to take up positions on and beside the hill.

A closer look at "tasking" the ADCs.
Round 3 - British commander uses an ADC to "buy" an activation re-roll on the hesitant left-hand brigade. Sensible stuff.
But they still don't activate (rolling a 1 and then a 2 - I believe they activated on a 3 or more!)

The dreaded orange "Hesitant" tag is applied.
They are stuck. Navel gazing, perhaps? Sympathies for the rebels?


American artillery opens up on the British.
Disaster - they roll very low and end up causing a fatigue/casualty point on themselves.
Must be a home-made cannon. Or too much moonshine.

The fatigue/casualty/shock mechanism appears in lots of games. In this version, a unit's ability to fight decreases at set levels of shock. It's hard to remove shock in this game, but it can be done. No bases are removed as casualties, except in some cases for skirmishers. I quite like that as it neatly covers the mental and physical impact of combat. The battlefield does become a bit littered with little markers but I'm used to this with IABSM. Secretly, I'm rather happy to use these counters in other games having spent the time putting them together.


The Grenadiers' assault on the farm


The Grenadiers give a lusty "huzza!", the Brigadier waves his hat and they charge into the farm. The defenders give a volley, causing 2 shock. The shock dice is in a green sabot, meaning the unit still fights at full effect.


Above: GdA has an interesting combat mechanism. First you need to see whether the charge makes contact and then you might end up in combat. It's realistic but takes a turn or two to get your head around. In this case, the Grenadiers (and the defenders) rolled very high. The Grenadiers pushed through the volley and attacked with "elan" (a bonus.) The defenders have been forced into an "unformed" status, which is usually a bad sign. But they are elite troops and hold the defence. It comes down to the dice ...


... and the Grenadiers are thrown back in disarray. Hmm, who'd have thought that a frontal, unsupported assault on a prepared defence (held by elite troops) could fail? It seems we have a set of rules that respect the history!

But Jonny Lobster doesn't give up that easily
A turn or two later and they've lined up a flank charge.
What was happening elsewhere? Well, quite a bit of realistic manoeuvring but I edited it out

American rush up a battalion to support the beleaguered Light Inf in the farm

The charge is successful

This time, the Americans are forced to retreat and the British seize their first objective


The British left flank finally gets moving. 
Only a weakened Militia brigade between them and the "crossroads"

British applying pressure on the right too
In retrospect, the Brits did not have enough troops to carry the hill
A feint, followed by a focused attack on the left would have been better?

From the Patriot lines - the reserve brigade shows up.
It includes some cavalry and lots of regular Continentals.
This scenario just got a lot harder for the King's men!


On the right, a doomed advance. Only one unit can charge unless the brigade is on assault.
Trouble brewing for the Lobsters, even if the Rebels go Hesitant.

Ooof. Or something similar. The British right is in tatters.

You're advancing the wrong way! Retreat backwards!


Meanwhile, over on the left, the Militia decides that discretion is the better part of valour
They exchanged volleys with the Brits and headed for the safety the field walls.
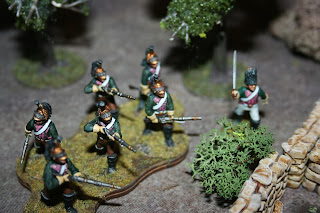
Far left, a skirmish developed in the forest between Jagers and a rebel Militia battalion.

The Militia retreats but the fresh reserves plug the gaps.


On the far right of the British lines, a cavalry skirmish.
The Continental Dragoons throw back their British counterparts.
It was an interesting sub-plot to the game.
British plans to outflank the Rebel lines were thwarted.


Back to the centre.
Over a couple of turns, the Rebels are in real trouble.

They re-form but are pretty ineffectual owing to shock/casualties.

The battered infantry retreat off the board.
The Continental Dragoons elect to charge. 
The Grenadiers.
Bad idea.

The cavalry doesn't complete the charge and are driven off by a volley.
Mind you, if they had charged in, it would have been an interesting match up.


With the right wing exhausted, the British try one final push on the left to capture the "crossroads."

A good volley and a successful assault makes some headway over the wall.

But in a final ignominy, veteran British line are repulsed by raw Militia.
No bayonets? No problem! As long as you're in a forest, behind a wall.
 

That action wrapped up the battle as the British forces were pretty exhausted. It was tight, with the shock building on the fresh Rebel reserves around the crossroads and the large brigade on the hill unable to support them. The British had captured the farm (their first objective) but had neither dislodged the Rebels from the hills nor captured the crossroads. So it was a bloody repulse for the British who would need to lick their wounds. One battalion made it to within 6" of the crossroads but they would have been surrounded and elected to retreat.

Thoughts on the rules:
It was great to play a "grander scale" engagement for a change and I'll give GdA another whirl sometime soon. I really enjoyed the rules and I picked them up quickly for a first run through. The modifiers, outcome tables, etc are easy to read. You basically need the QRS for most of the game and the rulebook for a few specific situations. The adapted AWI rules worked brilliantly. The command friction played an important part in the game. The rules encourage reasonable tactics and outcomes. In some cases, you need to decide when and where to exhaust a battalion to achieve a wider objective. There are some fun "lardy" elements to the game but they don't distract from the scenario in play. I can see why the skirmishers have different rules but they are a bit wonky at times. In these types of games, I'd keep them to a minimum and probably on the flanks (no skirmish screens, thank you.) They can tip the balance at a key moment but don't dominate.

The ADC phase is really interesting. But you need enough ADCs to allow interesting things to happen. So I amended the rules a little bit: each general began the game with a "reserve" ADC they could use at any time (and then lose.) Then, during the early turns in particular, I realised there were times when ADCs could not be used. So how about turning 2 unused ADCs into a single "reserve" ADC for a future turn (with a commander having a maximum of 2 reserve ADCs at any one time) that can't be used on activation re-rolls? I quite like the idea of saving these as part of a grander strategy, like making sure an assault happens, but it keeps the command friction as an important element of the game itself. I doubt this would lead to more than 3 reserves being available to a commander during the game, so it won't break the system?

This kind of game needs a bit longer than an average club night (anybody remember those?) but it's perfect for an afternoon to evening social gathering.

Thoughts on the scenario:
This was a good scenario to learn all of the basics and a few of the advanced rules. In a multi-player game, I'd tweak the objectives a bit so the Americans had to move about. There's even room for some personal side-plots if needed.

Wednesday 23 December 2020

Gendarmes a Pied for Sharp Practice - Peninsular


Gendarmes a Pied

These had been a core element of my lead mountain for a few years. I'd originally thought about painting them up as Italian Light Infantry but realised they would make a decent fit for some Gendarmes a Pied for scenarios involving Spanish guerrillas. I rather like how they've turned out and the chamois trousers and waistcoat make a pleasant change from whites and browns. As usual, the flash makes the blue seem a few shades lighter than in they actually are. Contrast paints worked well on the bicornes, packs and boots. The main colours are vallejo with a few GW paints and washes thrown in.


They can fill in as anything in Sharp Practice I suppose, but technically they are Grenadiers so I've been using the alternative "superior" French "Glory Years" stats that can be downloaded from TFL. 

I had to try them out in a quick scenario attacking a British-held farm. Being freshly painted and based, things obviously went wrong from the outset. They managed to shoot their commander in the backside before charging gallantly at the courtyard below.


French skirmish support was provided by dismounted Dragoons - who quickly got stuck in a vineyard. The fumes from the wine-press affected their aim as they were shot off the table.


The British Light Bobs kept control of the farmyard, barely suffering a scratch! All over in about 45 minutes, which was handy as the Christmas fizz had nicely chilled by that stage ...


Sunday 20 September 2020

Mortal Gods


A Classical Diversion

Mortal Gods, Ancient Greece and a lot of fun


Test of Honour (II) had become a popular game at the club before lockdown and I was also involved in a cracking online game of it a few weeks back. The main factions for ToH seem to be covered so there seemed to be little point investing in more models, scenery etc. But maybe I'll go for some Ikko-Ikki if they come out.

Mortal Gods is a classical Greek skirmish-level game based on the Test of Honour system. It's roughly set during the Peloponnesian Wars (Sparta, Athens, etc.) Whilst a lot seems the same as ToH on the surface, there are some important differences in the mechanisms. It scales well for different players, the rules are pretty straightforward and runs along at a good pace. There is a good level of depth for the more experienced players which keeps it interesting. It's a skirmish game, so there are no massive blocks of pikes but you can form a kind of Hoplite Phalanx with certain pros and cons. My son picked up the key points after a couple of turns.

What's more, it's not particularly expensive to get into. The starter set is reasonable and includes a load of plastic Victrix models - enough for two pretty decent forces to get you started. Sprinkle in a few leaders (Lochagos, Promachos), some support models and maybe a couple more sprues of hoplites, archers/slingers etc and you've got all you need. Mortal Gods - Mythic (expansion) is on the rise at the moment and that scratches the Greek Mythological itch. It'll be a cracking setting.

Athens and Sparta were not well-covered at the club so my forces have them in mind (a bit further down the line, although I do have the cards to use them in a game.) At the moment, these forces are mercenary or minor Polis (city-states.)


Mercenaries from Kythnos or Mantineia

Kythnos is a relatively small polis-island which seems to have been part of the pro-Athens Delian League. There seems to be traditional links with Poseidon, Tridents and the Kraken. Given the shield blazons I had, this seems to fit quite nicely. Mantineia had an interesting history, hopping between Athens and Sparta at various times.

Lochagos (leader) in the centre with the eye symbol on shield
Variety of Promachos (heroes) in a variety of armour.


Showing the shield designs


Peripoloi - Lightly armed warriors with Hoplite spears
Blue-shielded chap serves as a Veteran Hoplite if needed (ordering others around)


Hoplites - heavy armoured spears


Peltastes (light javelin troops)
Toxotes (archers)


Various support - Mantis (scrying the Fates), Medic, Musicians


Sparta / Peloponnesians - Kythira

Again, the beauty of the classical period before standardisation of shields, uniforms, etc is that these chaps can represent various Polis, including Sparta. Kythira (mythical home to Aphrodite) was heavily involved in fighting Athenians / Delians.


Lochagos (centre.)
Promachos (what's the plural?) either side.
I'll repaint the white cloth red for the Promachos on the left. 
It can get confusing when they charge around!


Peripoloi - light Hoplites
I really like how these came out.


Hoplites
It seems that the Spartan lamda shield came in later, and only for a few elite units?
These will do for Spartans or Spartan allies


Spartans weren't keen on lighter troops it seems.
More Peltasts and Archers - allies.
Thinned "contrast" reds and oranges work well.


Models/Paints

All the rank and file are plastic Victrix. Great for the price.

The leaders are all metal from Mortal Gods / Footsore Miniatures. Slightly feeble swords but nice sculpts.

I gave Citadel contrast paints a whirl. Use the thinner! It makes for some brilliant results. There are a few that I'd avoid but the greens, reds and yellows are great. I didn't get on very well with any of the flesh tones. They came out blotchy, even when thinned. So I reverted to acrylics for the Greek-tanned skin.

The shield designs are by LBMS. Fiddly but nice. A touch expensive but OK for skirmish level games. Derek also kindly printed out the Trident transfers which are actually my favourite of the lot (except maybe the spiral swirly thingies) and were dead easy to apply.

Peninsular War: Dragoons for the French and Light Dragoons for the British

How to train your Dragoon?

British Light Dragoons and French Dragoons for Sharp Practice


No literary-inspired Napoleonic shenanigans would be complete without some Dragoons. Mounted up they play a bit like a one-shot wonder and I'd think carefully about using more than one group in a normal size game. But the threat of their movement range and potential damage in combat makes for some interesting command decisions on both sides. They can be used in loads of different scenarios. I quite like the idea of random arrival in the mid-game, possibly on the use of "flags" like Tabletop CP have done in some of their cracking AWI reports on the YouTube.

Dismounted, I feel they need some alternative rules. So I've tinkered away. I treat points as guidelines really (you can break any point-based system) but it seemed a bit much to count 6 dismounted Dragoons as the same as 8 of their mounted friends.

There are various accounts to give us pointers of what they did on foot, such as Badcock's memoirs and Vandaleur's rules (?) for Light Dragoons on campaign. (OK, need to find some French sources.) Vedettes, scouting, foraging, escorting. Actually they are perfect soldiers for SP2.

One group on foot (6) plus a low-ranking leader makes for a handy extra unit in multi-player games. I tend to rate them simply as skirmishers with carbines to make them less effective than good quality "light" troops. I sometimes sprinkle in "sharp practice", "good/poor shots" or "aggressive" to alter their potency. Depending on the scenario they might have a prominent leader if they are reluctant to stick around.

All the models here are Perry plastics except the British dismounted troops which are Perry metal (and rather nice.)


British Light Dragoons

The troop from the 14th Light Dragoons has been posted before. But I wanted a leader on foot. I looked at Perry's dismounted officer group from the Egypt campaign but looking in the bits box I had some spare plastic legs, torso, arms and heads. The resulting kit-bash works for me and saved some cash for another project. So here is the dashing Lieutenant Shattenkirk (soon to be renamed Badcock.) I say dashing, but so far he's either failed to arrive, got lost on a clearly marked road, been shot up the backside or been massacred. Not a great record. 

I gave him a lighter coloured coat to the troopers - not sure that's particularly historical but to identify him. He seems quite short without the massive Tarleton on his head.


Shattenkirk surveys a local well. He later misinterpreted orders and leapt into it. 

This made it harder for the troopers to follow his commands.


French 15th Dragoons

These chaps have rather fetching rose-pink facings and were recorded with green collars. I've missed some details so I'll go back over these but they are tabletop-ready. For the first time in ages the painting seemed more like a chore than a pleasure! 

They are led by the massive moustache of Capitaine De Rigeur, a man who desperately seeks some white cloth to make proper trousers for his troopers. De Rigeur attended Brienne school with Napoleon and was twice nominated for turnip of the month. He's another kit-bash to create a dismounted leader. 

Citadel contrast black and white came in handy on this model. The dark green and pink were not so good, so returned to acrylics for that.


Nemeses?

The leaders on foot.